Navigation:
Home Page
Action Origami
Kirigami
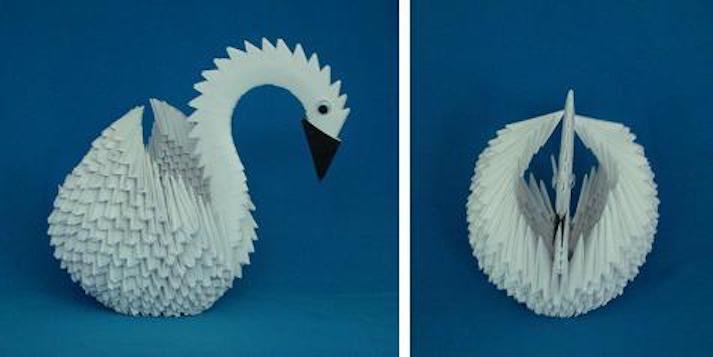
Golden venture folding is where you fold small paper triangles with two legs and two holes each. These legs and holes allow them to slot into each over and further allow you to build huge and cool looking sculptures. Most people make swans or over bowl shaped things as they are the easiest to start with.
One of the most well known model of golden venture is the swan. This model requires roughly about 400 to 450 units
1.
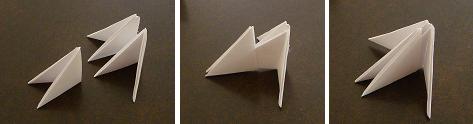
Fold between 400 and 450 triangular units . These can be done by starting with a square sheet of paper and cutting it into 4 strips. Fold the strips in half crosswise. Fold the bottom-left and bottom-right edges up to meet the midline. Turn the model over. Fold the top-left and top-right corners towards the middle of the unit. Fold the triangular tab down on both sides. Fold the right side onto left side. The directionality is critical here. Do not fold the left side behind the right half. When done, the unit should have two tabs and two pockets and it should look something like this.

2.
Position B: triangle rests on the broad edge of the triangle: similar to a mountain;
pockets are also visible.
Row 1: begin by arranging 30 - 35 triangular units in a row.
These units will be Row 1 of the swan.
The number of units you use will depend on the thickness of the paper used.
Row 2: connect Row 1 into a ring by using "connector" triangular units. These connector units will become Row 2 of swan. To do this: place two Row 1 units side by side in position A; insert the points into the pockets of a connector unit (also in position A) this forms a cluster of 3 units
Continue in this manner: place the cluster made above beside another Row-1 unit; connect them together with another triangular unit; this forms a cluster of 5 pieces.
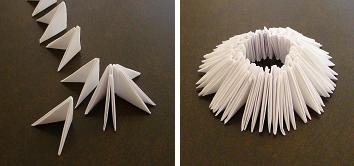
Repeat until all Row 1 units have been assembled. Connect the first and last pieces together to form a ring. At this point you would have used 30 units for Row 1 and 30 connector units which make up Row 2 of the origami swan. Turn the ring over so it no longer looks like a cone: now it looks more like the bottom of a bowl.
3.
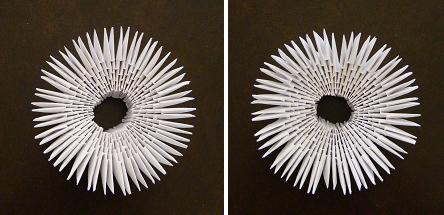
Row 3: continue assembling the body of the 3D origami swan by adding more triangular units. Note that the triangular units are now added while in position B. Be sure to insert the points of two different units into one connector unit. Inter-locking the units in this manner will keep the 3D origami swan body together.
4.
Rows 4 to 6: Continue adding more triangular units until you have completed Rows 4, 5, and 6.
5.
Rows 8 - 20: continue to add more triangular units row after row. In each row, use one less triangular unit. The 3D origami swan will get more and more narrow forming two triangular wing sections. Row 20 will only have one triangular unit on each side: it is the tip of the swan's wing. As you assemble, allow the pieces to curve naturally to form a bowl-like shape.
Connect approximately 30 triangular units in a linear manner. Position the units in position A and insert one unit into the pockets of a second unit. Allow the pieces to curve naturally. A question mark shape works well, but other neck shapes are fine.
Simply connect 4 or 5 triangular units in mountain position (position B). Depending on what the 3D origami swan will be used for, you may wish to add a drop of glue in each triangular unit of the neck. The neck is the most fragile part of the 3D origami swan so glue is good. Glue is not needed for the body and wings of the swan. Insert the neck at the "6 oclock" position. Insert the tail at the "12 o'clock" position. Optional: you can fold a black sheet of paper into a triangular unit and use this as the swan's bill (insert in position B). You can also embellish with googlie eyes.
Watch a more detailed tutorial down below!